Manage NITAAC Finances
Users assigned to the NITAAC Finance User role track payments and other items in e‑GOS. See the following for more information about specific tasks:
To Add Payment
Start on the Contract Holder Details page.
Tip
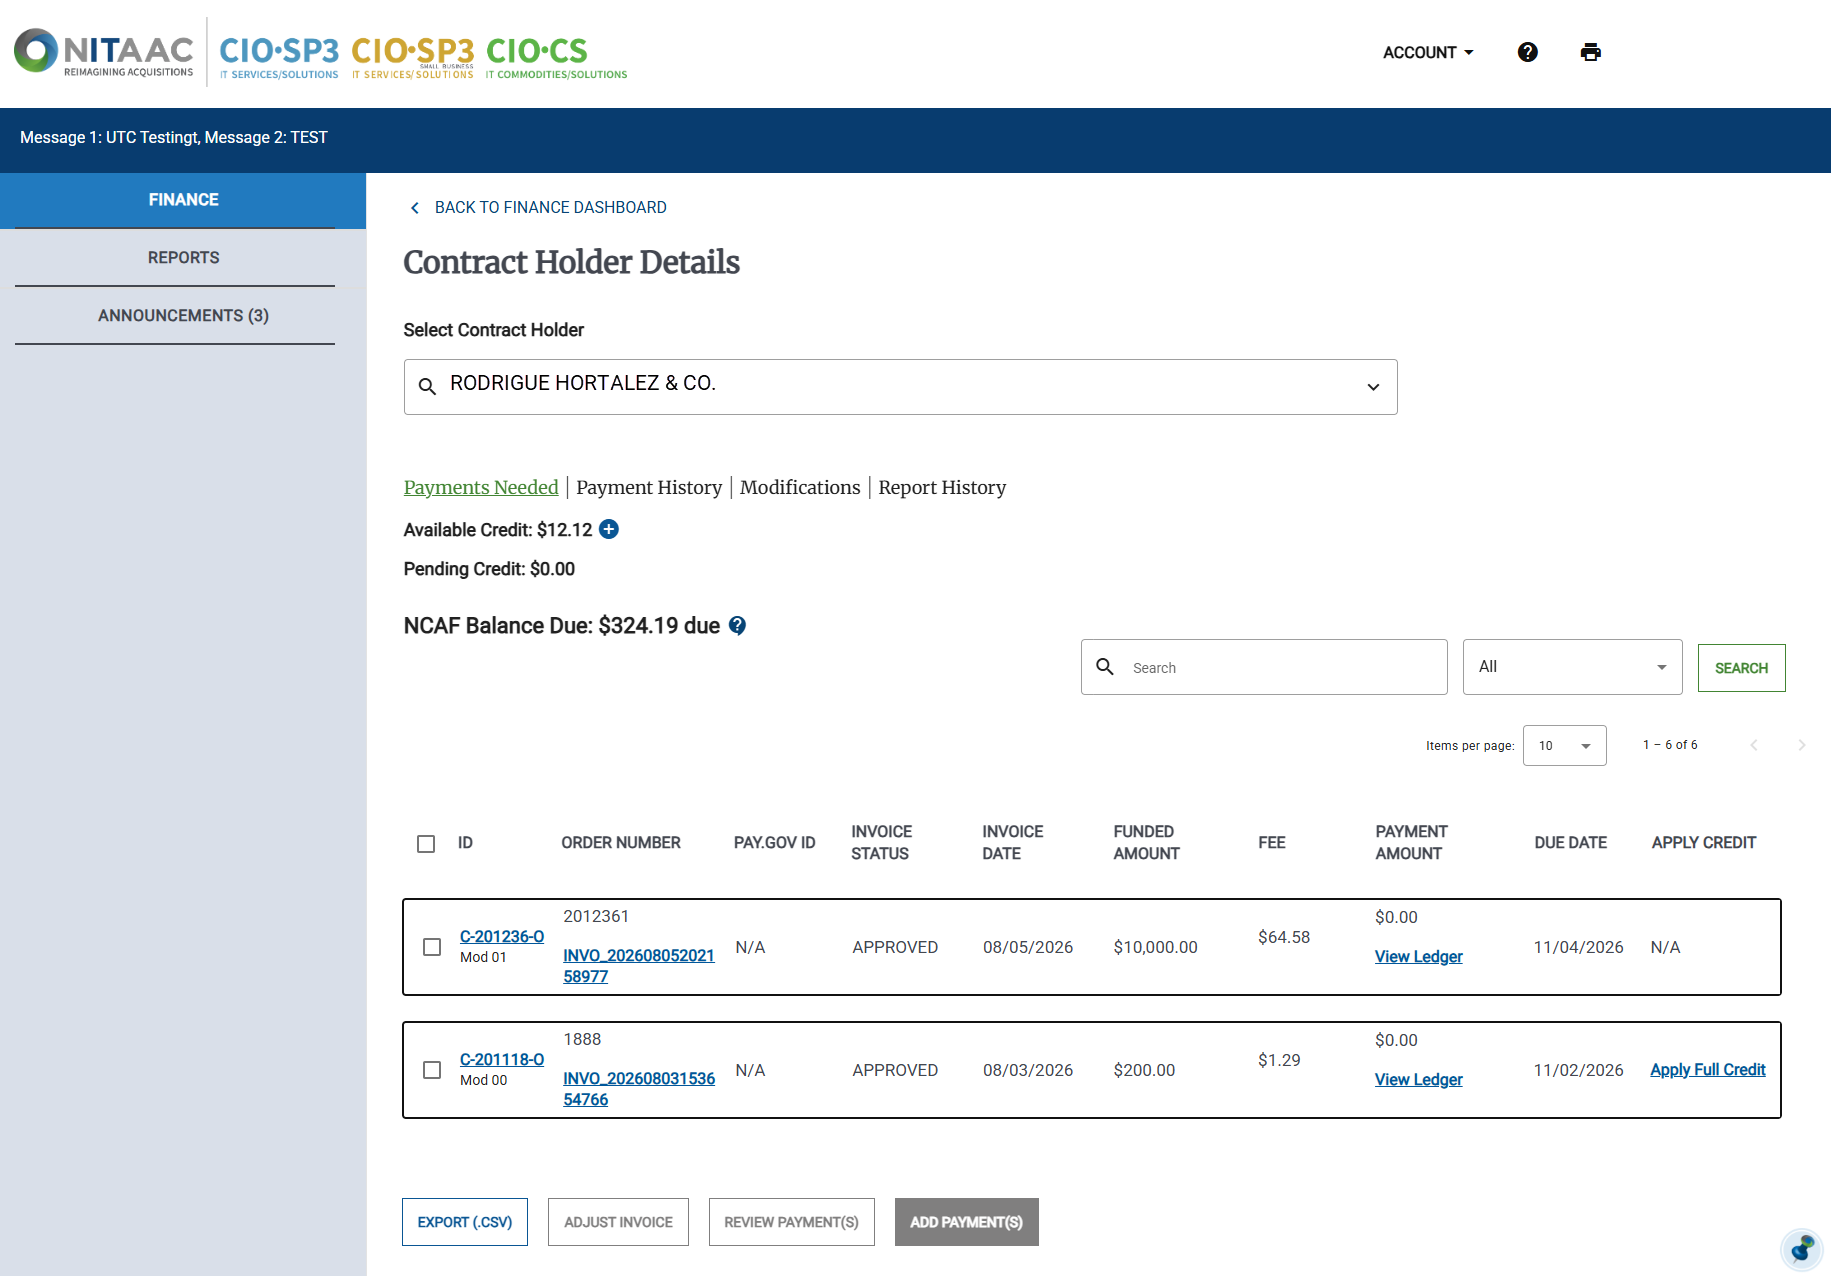
Click the checkbox
 next to the order.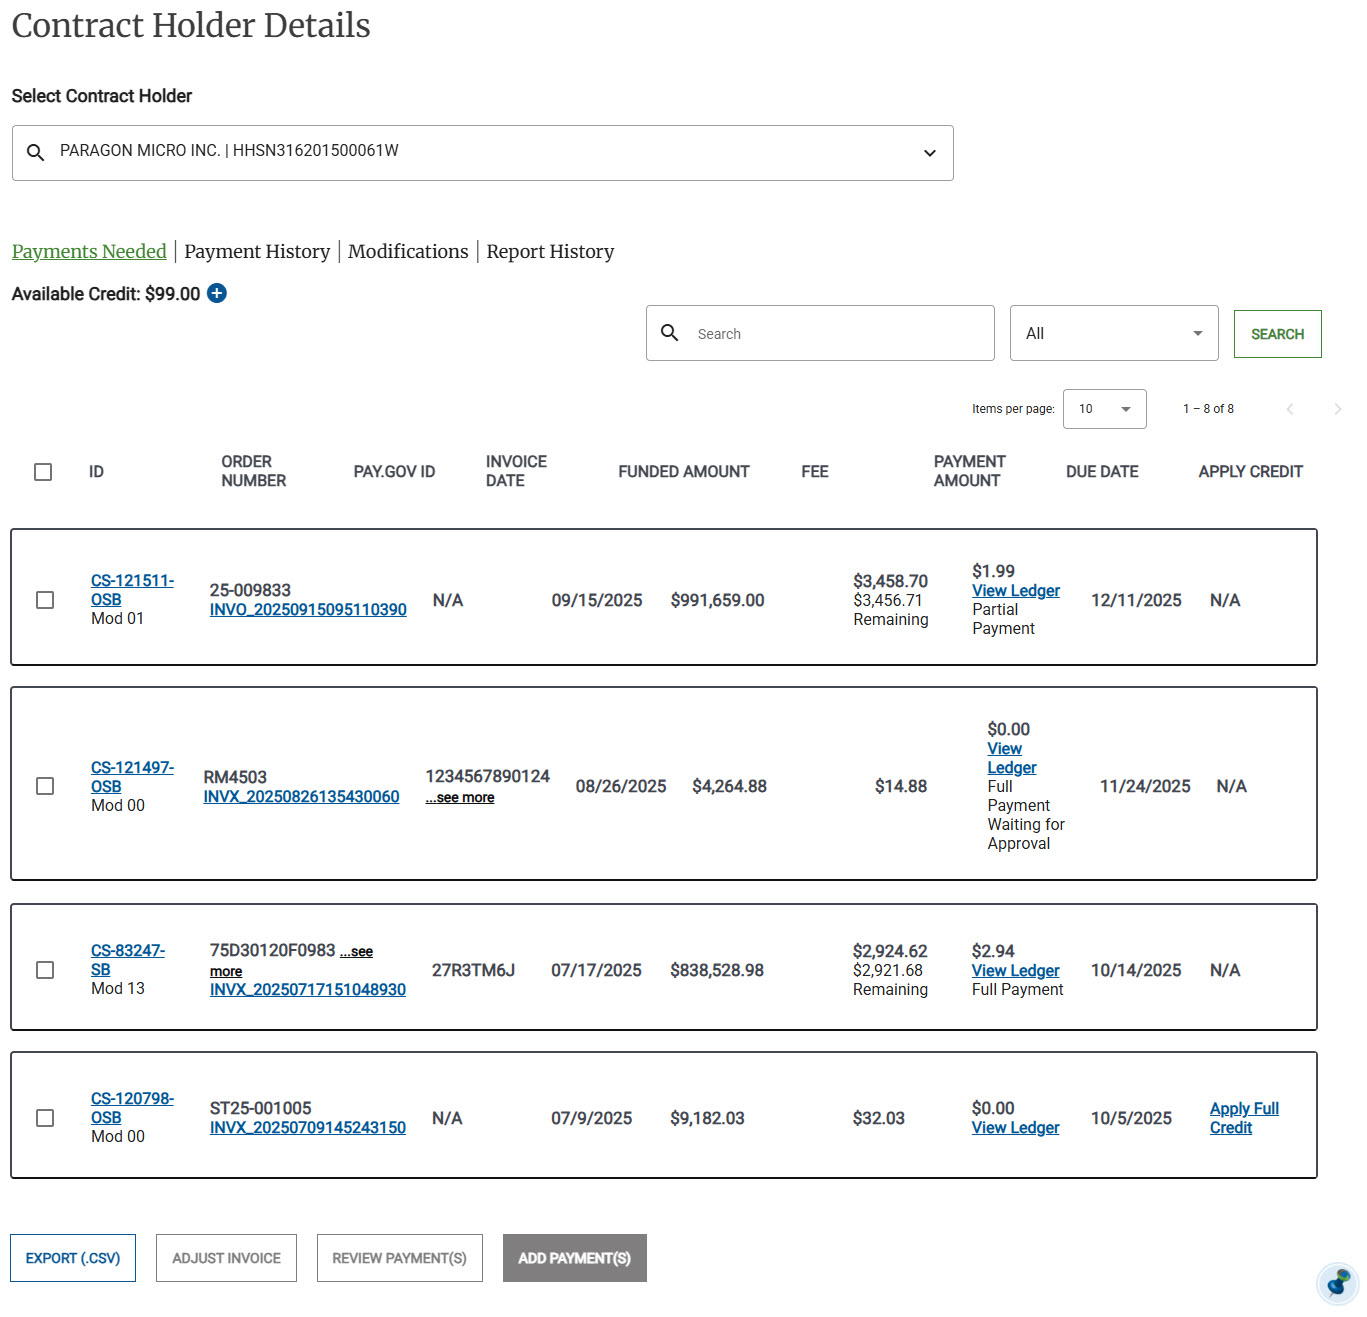
Click Add Payment(s), the Add Payment(s) for Contract Holder appears.
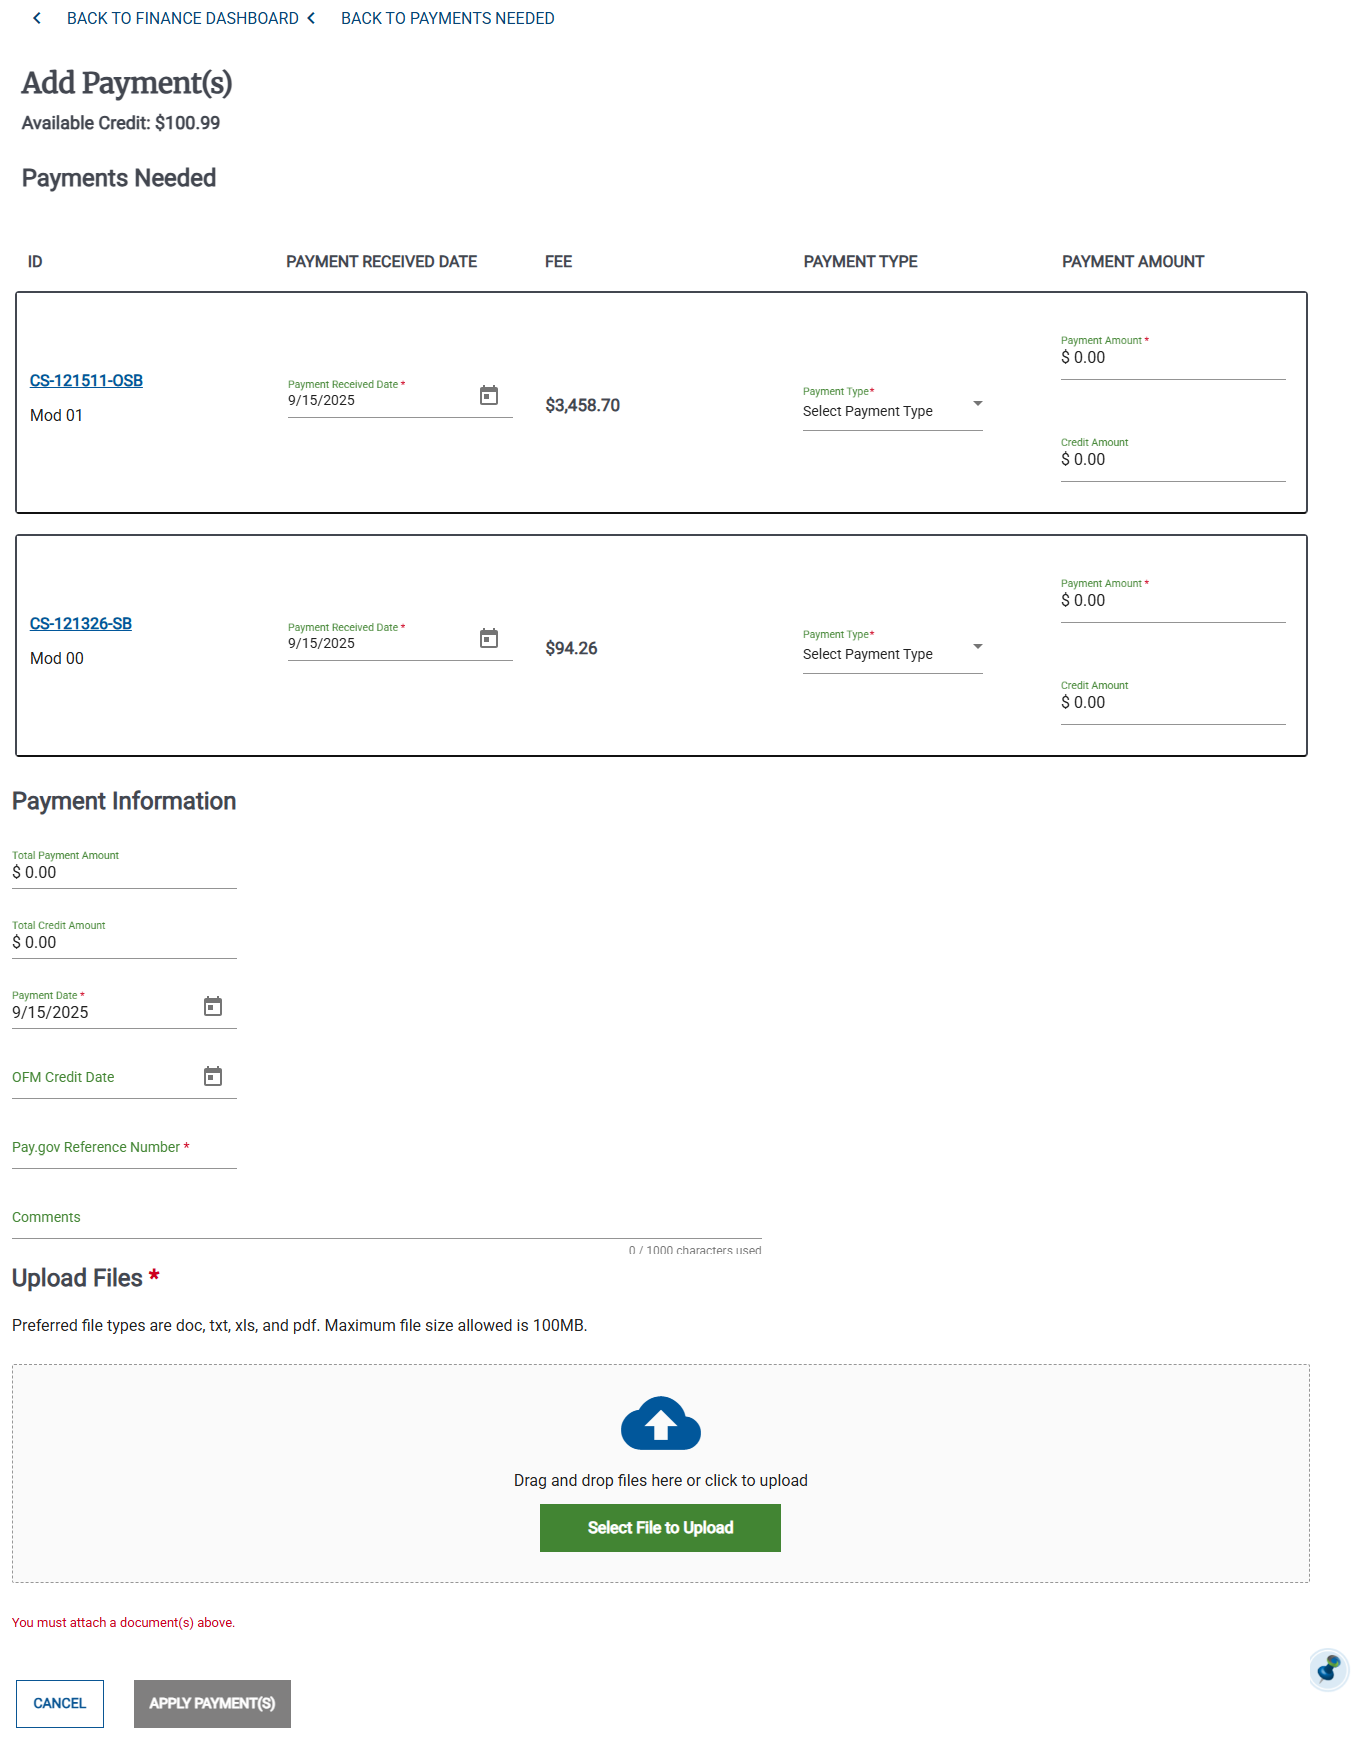
Select the Payment Received Date.
Select Partial Payment or Full Payment
Note
If you select Full Payment , the Payment Amount fills automatically.
If you select Partial Payment, you must manually enter the amount of the payment in the Payment Amount.
Enter the following information:
Payment Date
OFM Credit Date
Pay.gov Reference Number
Comments
Review the payment details, then click Save. The payment moves to the Payment History.
To Adjust Payment
Start on the Contract Holder Details page.
Tip
Click the checkbox
next to the order.Click Adjust Payment, the Adjust Payment for Order XX, MOD XX appears.
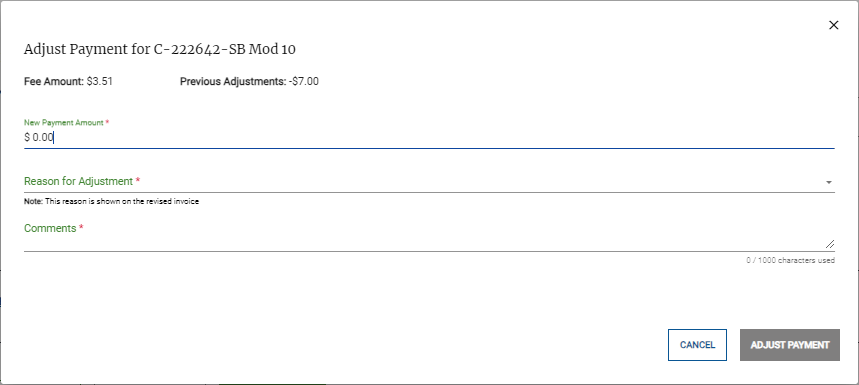
Enter the following information:
New Payment Amount
Reason for Adjustment
Comments
Review the payment details, then click Adjust Payment. The Payment Needed page appears with the new Payment Amount.
To Add Credit
When a Finance user creates a request to add credit to a Contract Holder account, a NITAAC Contracting Officer for the GWAC reviews and approves it before the credit is available. Only a Finance User can add a credit request. Only a NITAAC Contracting Officer can review and approve the request.
For information about managing credit requests, see Manage Credit Requests.
For information about approving a credit request, see To Approve a Credit Request.
For information about rejecting credit requests, see To Reject a Credit Request.
Start on the Contract Holder Details page.
Tip
Click the plus sign (+) next to Available Credit. The Adding Credit pop-up appears.
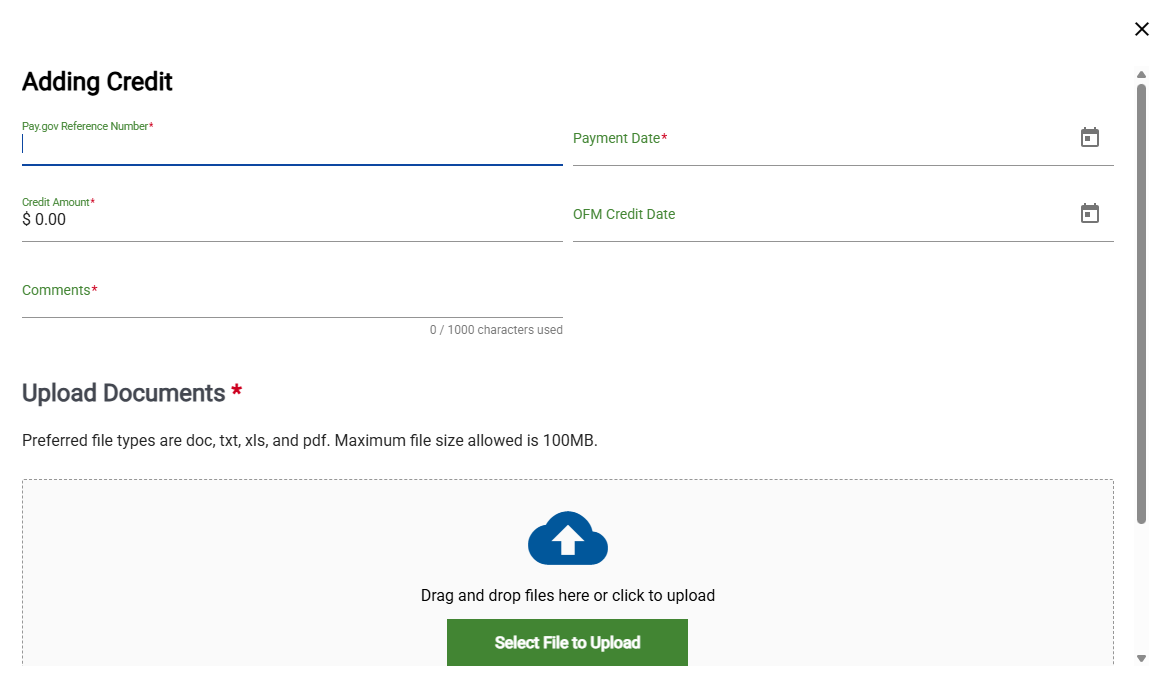
Enter the following information:
Pay.gov Reference Number
Payment Date
Credit Amount
OFM Credit Date (Optional)
Comments
Click Submit for Approval. The e‑GOS system notifies the Contracting Officers.
To Apply Full Credit to Payment
Start on the Contract Holder Details page.
Tip
Click Payments Needed. The payments needed order list appears.
Note
Available credit must be greater than $0
Applicable payments have a Apply Full Credit link
Click Apply Full Credit for an applicable payment. The Confirm pop up appears.
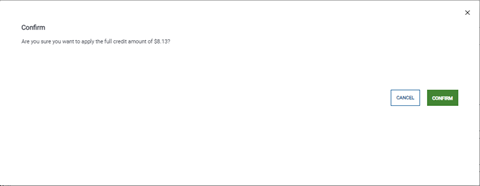
Click Confirm
Note
The payment is moved to Payment History.
The Available Credit balance is adjusted.
Repeat with additional applicable payments.
To Apply Partial Credit to Payment
Start on the Contract Holder Details page.
Tip
Select the checkbox
next to the order that you want to add partial credits to.Tip
You can only add partial credit to a single order at a time.
Click Add Payment(s), the Add Payment(s) page appears.
For each order, do the following:
Select the Payment Received Date
In the Payment Type drop-down list, select Partial Credit
Enter the Credit
Select the Payment Received Date.
In the Payment Type drop-down list, select Partial Credit.
Enter the Credit Amount.
Enter the following information:
Payment Date
OFM Credit Date
Pay.gov Reference Number
Comments
Review the credit details, then click Apply Payments. The payment moves to the Payment History.
To Review Payments
Start on the Contract Holder Details page.
Tip
Click Payments History. The payments history list appears.
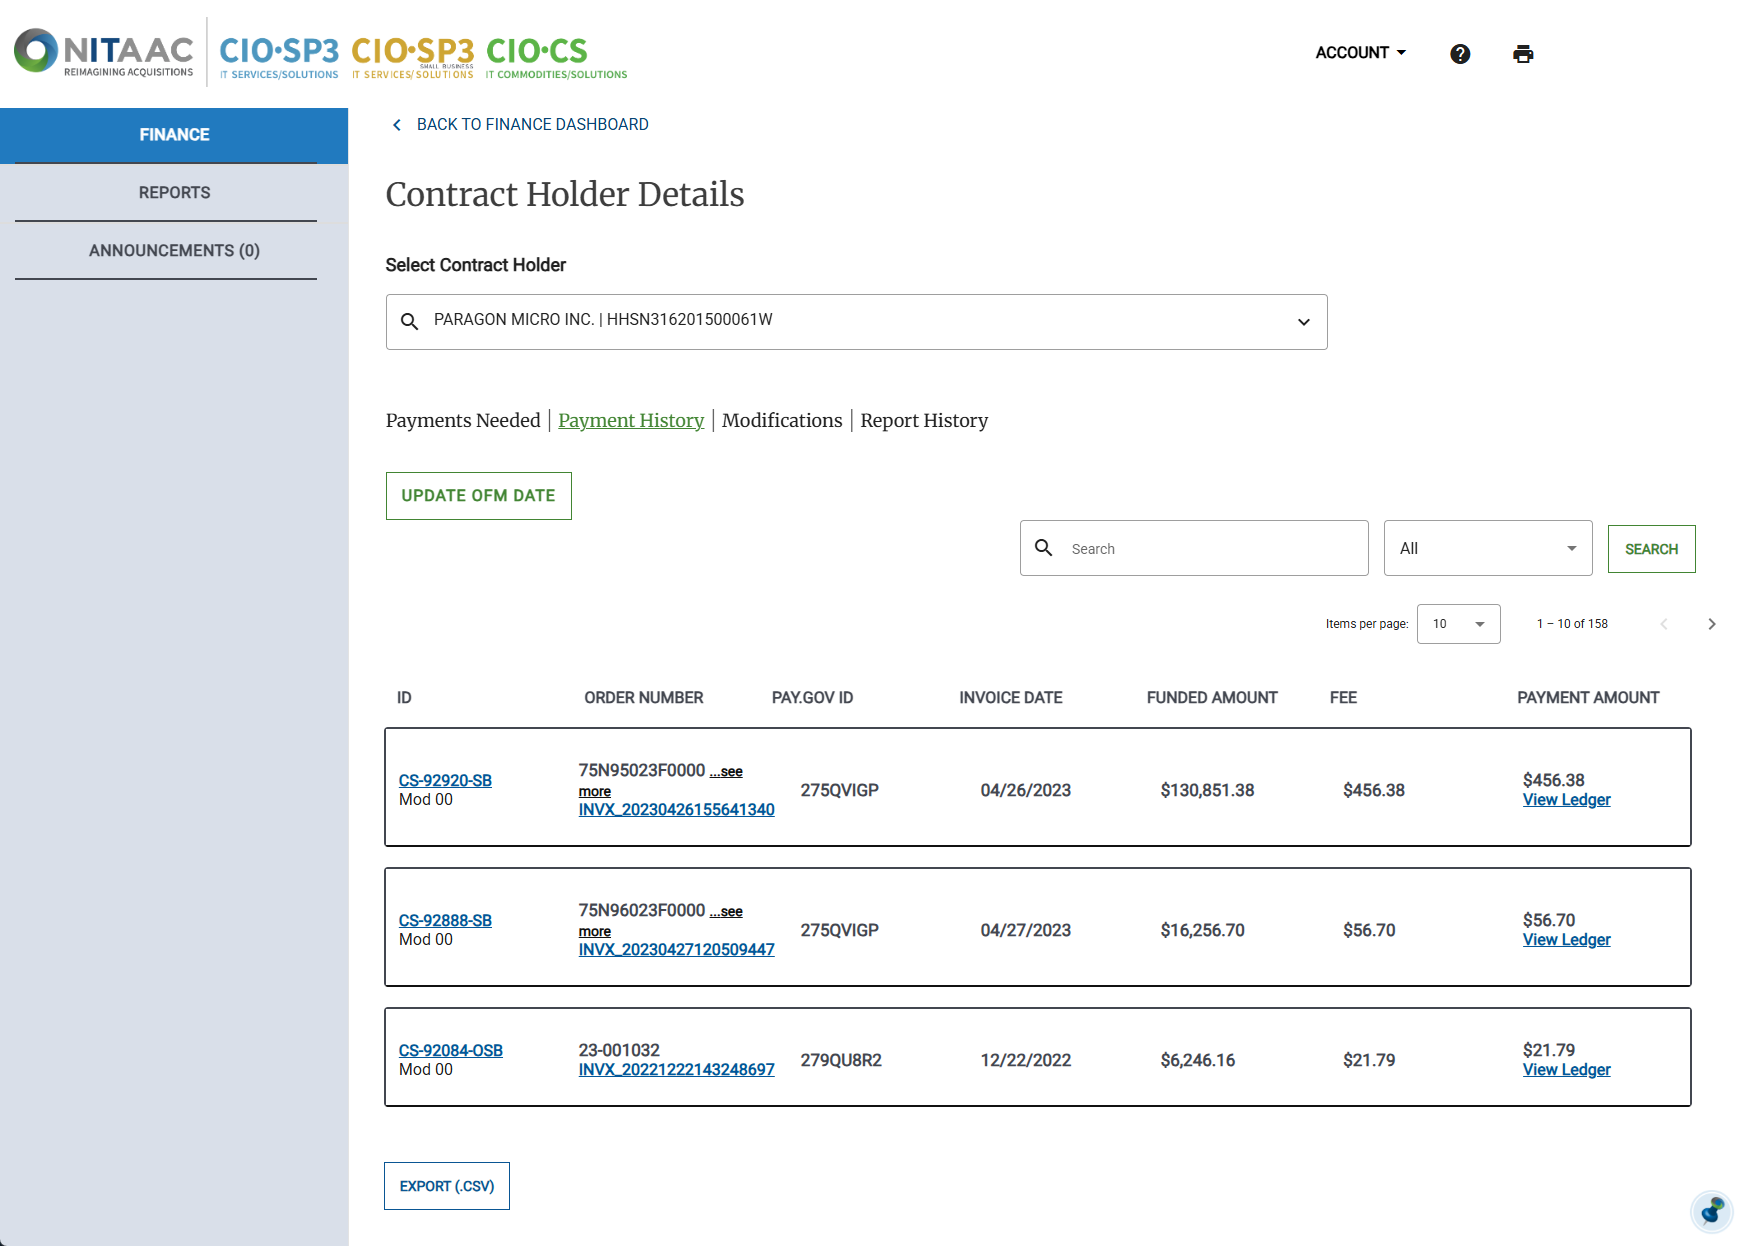
Click View Ledger for the desired order. The View Ledger pop-up appears.
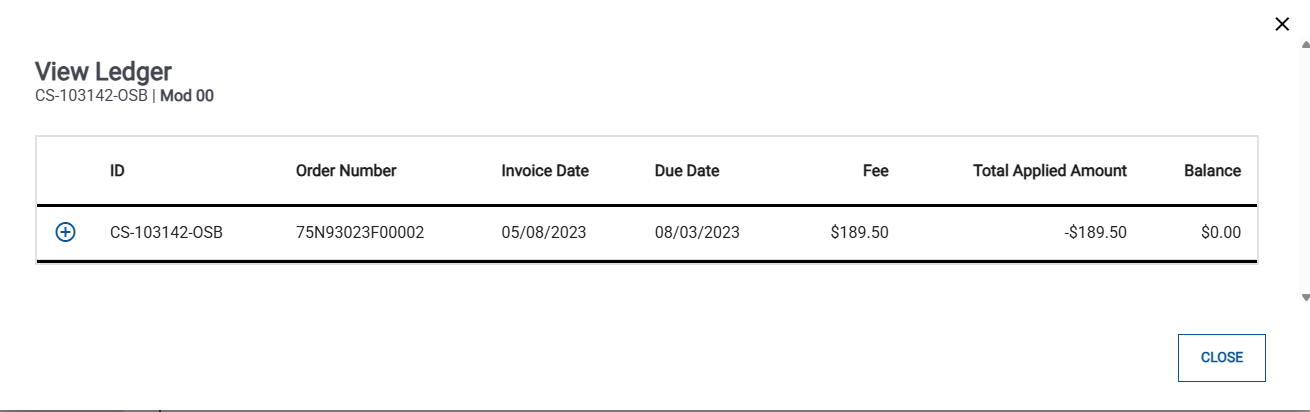
Click the plus sign (+) to expand the payment details.
Review the payment details. When you are finished, click Close.
To Download an Invoice
Start on the Contract Holder Details page.
Tip
Click Payments Needed. The payments needed order list appears.
Locate the invoice you would like to view and click Download Invoice for an applicable payment. The invoice downloads as a pdf.
To Request Credit for an Approved Payment
When a Finance user creates a request to add credit to a Contract Holder account, a NITAAC Contracting Officer for the GWAC reviews and approves it before the credit is available. Only a Finance User can add a credit request. Only a NITAAC Contracting Officer can review and approve the request.
For information about managing credit requests, see Manage Credit Requests.
For information about approving credit requests, see To Approve a Credit Request.
For information about rejecting credit requests, see To Reject a Credit Request.
Start on the Contract Holder Details page.
Tip
Click Payment History.
In the Payment History, select the checkbox (
) for the payment that you want to request credit for.Click Credit Request.
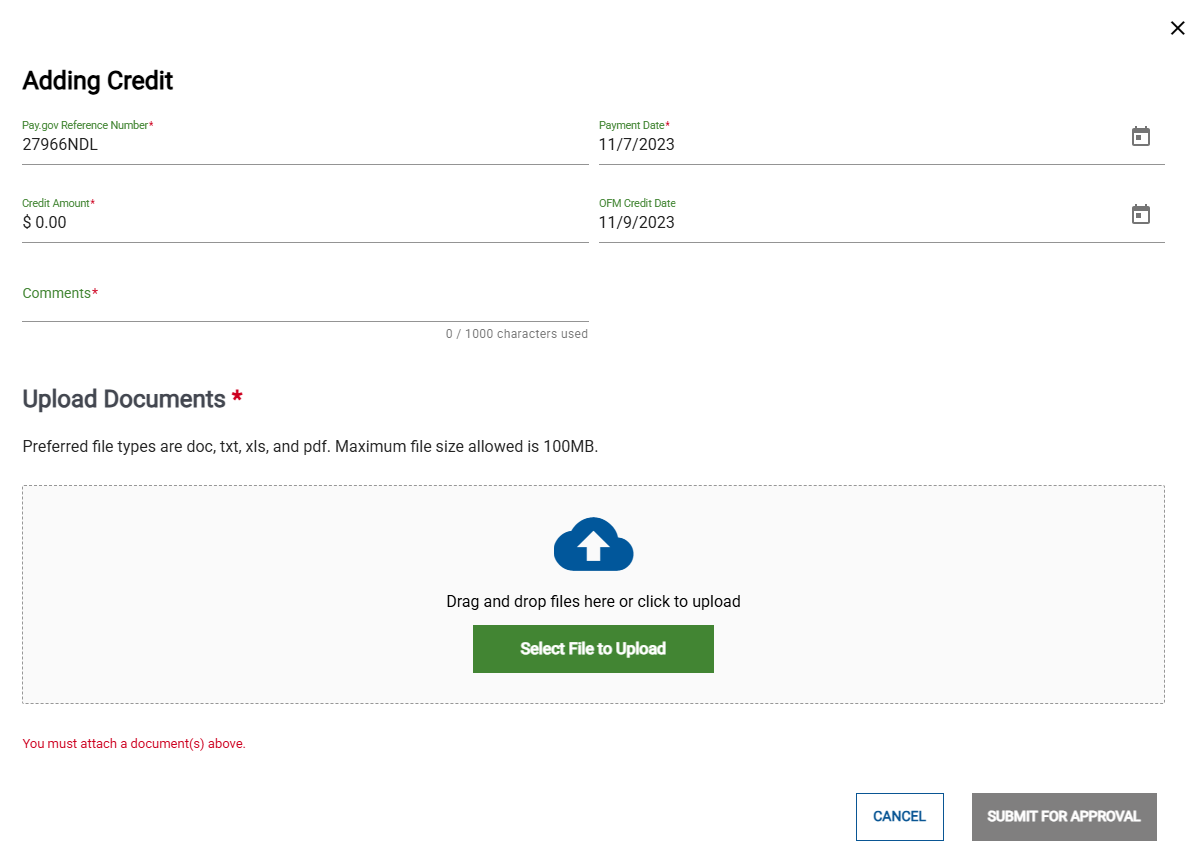
Enter the following information for the Credit:
Pay.Gov Reference Number
Credit Amount
Payment Date
OFM Credit Date (Optional)
Comments
Click Submit for Approval.
To Edit the Details of an Approved Payment
If needed, a Finance user can update the non-financial details of a payment.
Tip
To change the amount, Reverse the payment, then enter a new payment.
For more information about reversing a payment, see To Reverse a Payment.
For information about adding a payment, see To Add Payment.
Start on the Contract Holder Details page.
Tip
Click Payment History.
In the Payment History, select the checkbox (
) for the payment whose details you need to edit.Click Edit Payment Details,
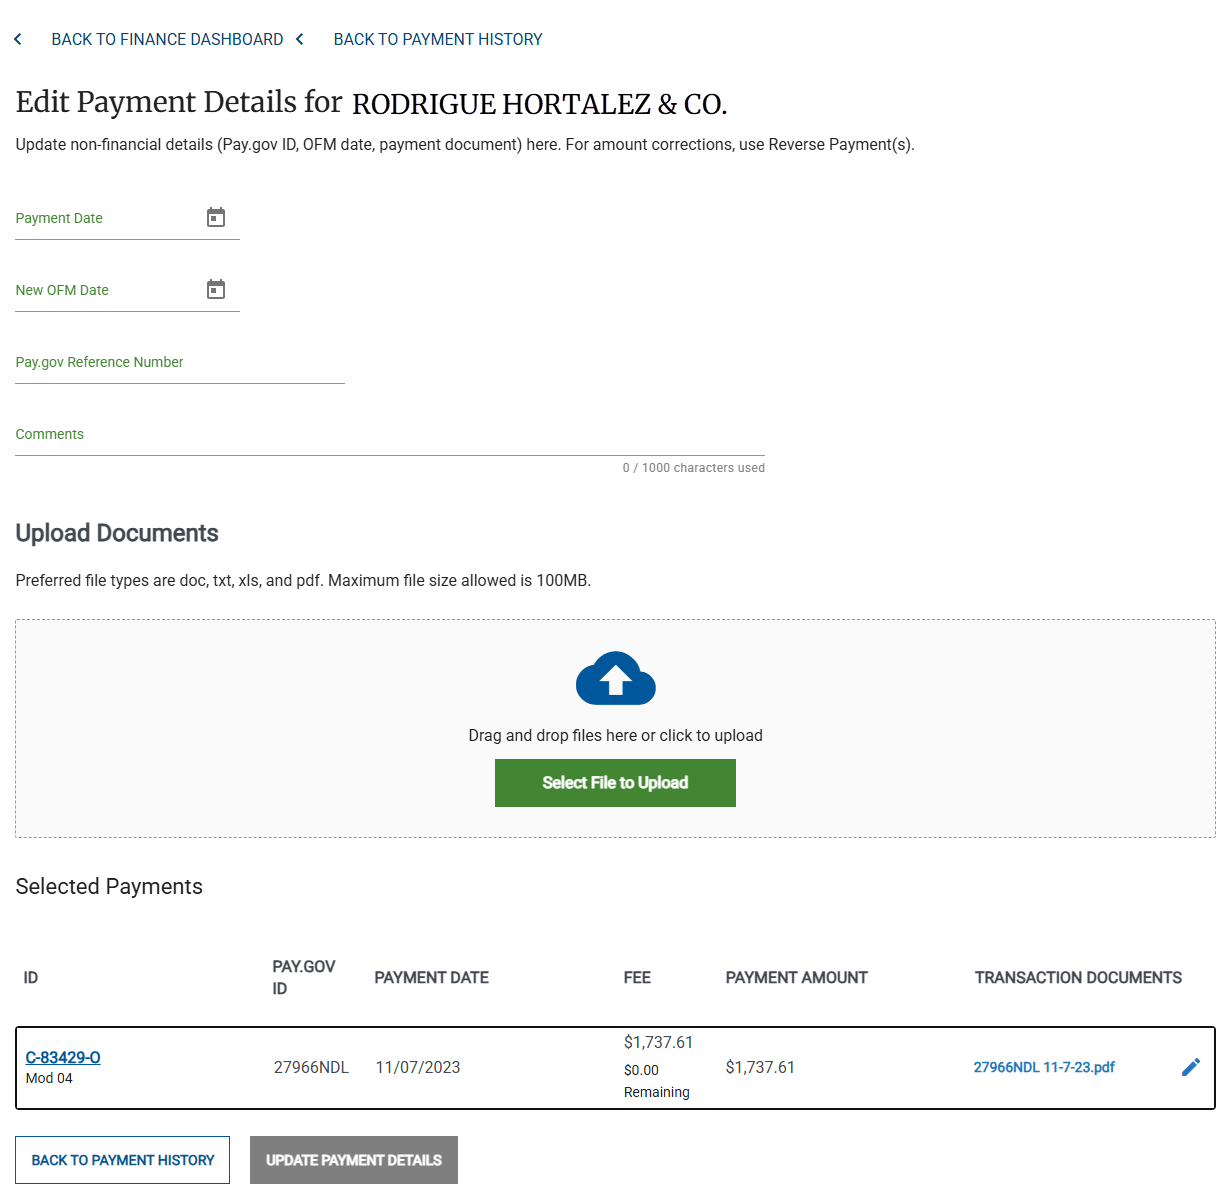
In the Edit Payment Details page, enter new values for one or more of the following:
Payment Date
OFM Date
Pay.gov Reference Number
Comments
Tip
Your changes will affect all of the Payments listed in the Selected Payments list.
When your changes are complete, click Update Payment Details,
To Reverse a Payment
If needed, a Finance user can reverse a payment.
Tip
To non-financial information, such as the Date, the Pay.gov reference number, comments, or to add a file, you can edit the payment details.
For more information about editing payment details, see To Edit the Details of an Approved Payment.
Start on the Contract Holder Details page.
Tip
Click Payment History.
In the Payment History, select the checkbox (
) for the payment that you want to reverse.Click Reverse Payment,
To Approve Payments
Start on the Contract Holder Details page.
Tip
Click the checkbox
next to each order that includes payments that you want to approve.Tip
The Payment Amount field for the payment must include "Waiting for Approval."
Click Review Payment(s).
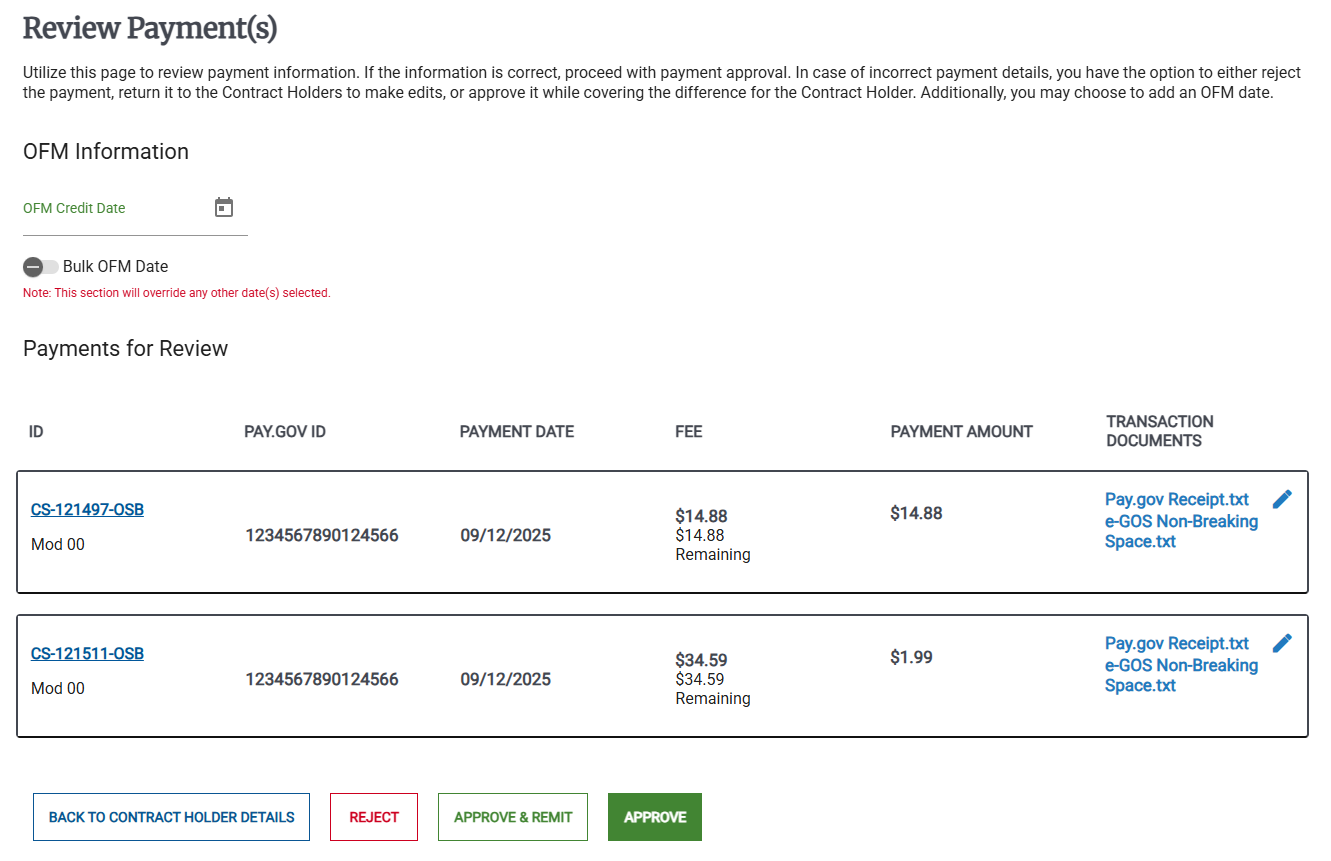
Do one of the following:
If you are reviewing a single payment, select the OFM Credit Date.
If you are reviewing multiple payments, do one of the following:
To set individual OFM Credit Dates, in the OFM Information area, select Individual OFM Date. Set each order's OFM Date.
To set the same OFM Credit dates for every order, select Bulk OFM Date, Set the OFM Credit Date for all of the orders.
Review the payment details, including the Transaction Documents, then do one of the following:
Click Reject to reject the payments. The Contract Holder is informed and can make changes.
Click Approve & Remit .
Click Approve.
To View Modifications
Note
Only approved modifications appear in the modifications list.
Start on the Contract Holder Details page.
Tip
Click Modifications. The modifications list appears.
Click the MOD Number for the modification that you want to view.
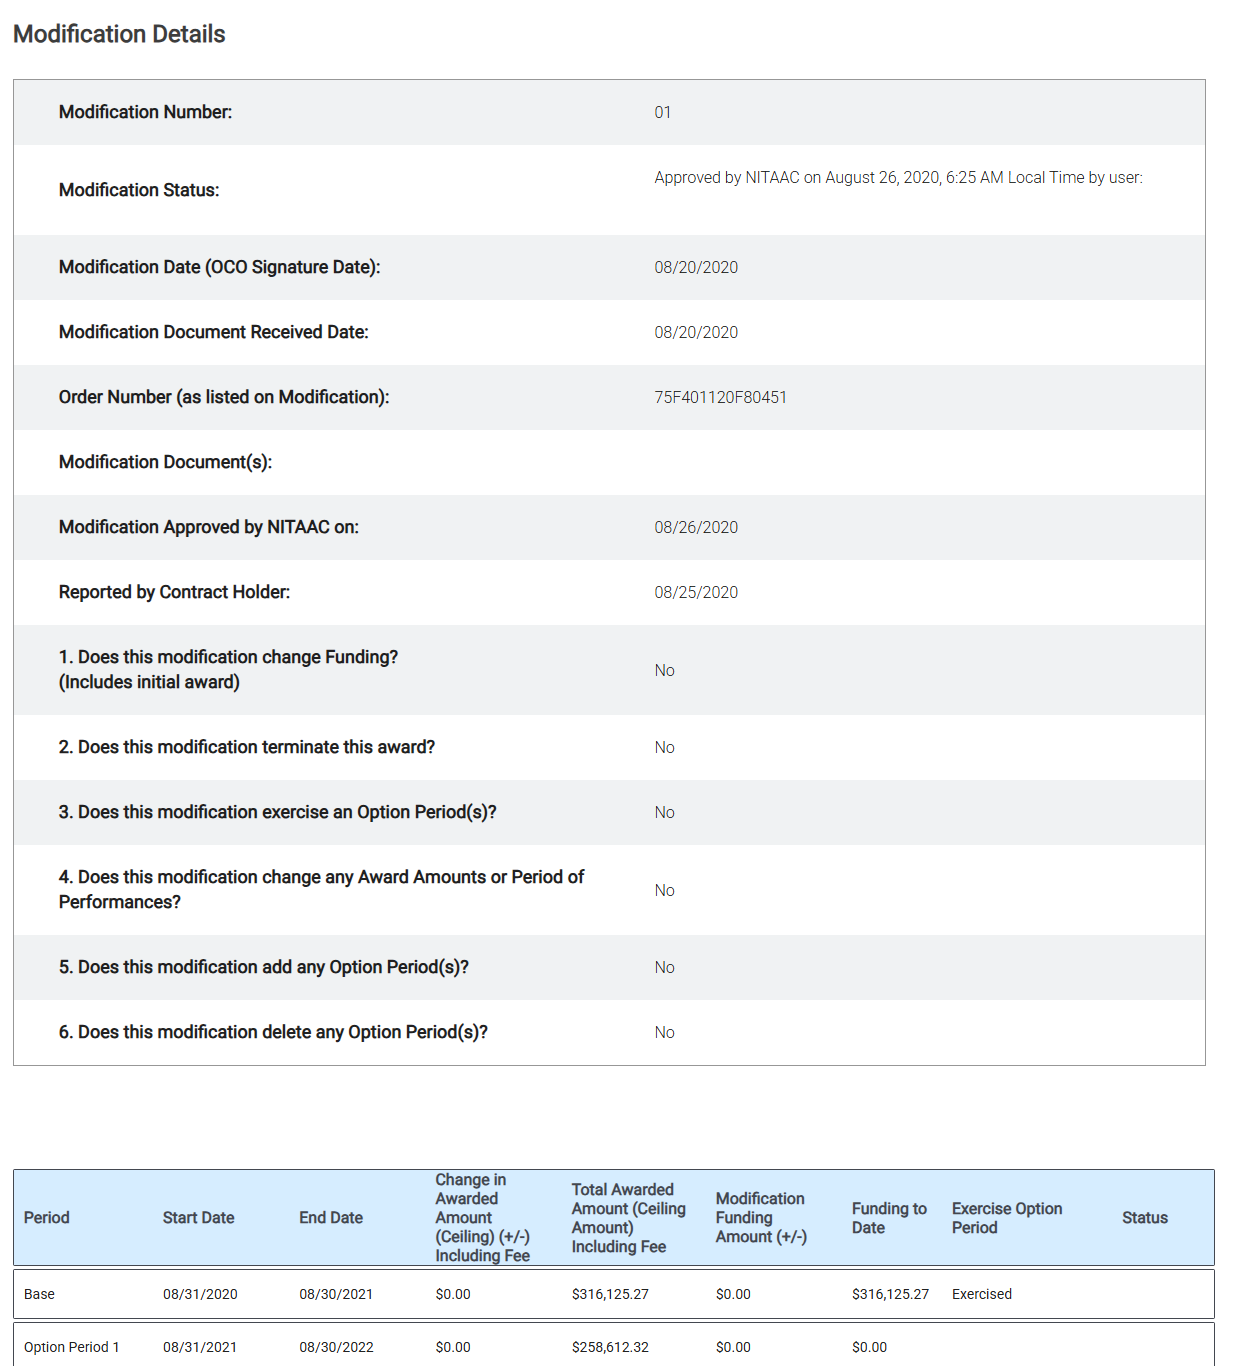
To View Finance Reports
In the Left Rail, click Finance.